How to wipe hard drive on macOS Sequoia?

updated on 2025-02-06 to Mac Data Erasure
Quick Navigation:
- Understanding Hard Drive Wiping
- Preparing to Wipe Your Hard Drive
- Methods for Wiping a Hard Drive on macOS Sequoia
- Alternative Tool for Secure Hard Drive Wiping
- Conclusion

Wiping a hard drive is a crucial task for anyone looking to securely erase their data before selling, donating, or repurposing a Mac. It ensures that all personal information, files, and sensitive data are permanently removed and cannot be recovered. With the advent of macOS Sequoia, Apple has introduced robust tools that make this process more efficient and secure. In this article, we will explore how to wipe a hard drive on macOS Sequoia, covering the necessary steps, tools, and considerations to guarantee a complete and secure wipe.
Understanding Hard Drive Wiping
Wiping a hard drive goes beyond simply deleting files. When you delete a file on your computer, it is often moved to the Trash and can be restored easily. Even when you empty the Trash, the data is not completely removed from the hard drive. Instead, the system marks the space as available for new data, but the original data can still be recovered using specialized data recovery software until it is overwritten by new data.
Wiping a hard drive, on the other hand, involves overwriting all sectors of the drive with random data or zeros, making it virtually impossible to recover the original information. This process is essential when you need to ensure that no trace of your data remains on the drive, particularly if the drive contains sensitive or confidential information.
In macOS Sequoia, wiping a drive can be done in several ways, each offering different levels of security. Understanding the differences between these methods is key to choosing the right one for your needs.
Preparing to Wipe Your Hard Drive
Before you begin the process of wiping your hard drive, it is important to take several preparatory steps. Proper preparation ensures that you don't lose any valuable data and that the wiping process goes smoothly.
Choosing the Right Method for Wiping
Once your data is safely backed up, you need to choose the right method for wiping your hard drive. The method you select will depend on your needs and the level of security you require:- Quick Erase: This method is fast and sufficient for drives that don't contain sensitive information. It erases the file system and prepares the drive for reuse, but does not overwrite the data sectors. While this method is quick, the erased data can potentially be recovered with specialized recovery software.
- Secure Erase: For those who need to ensure that data cannot be recovered, a secure erase is the better option. This method overwrites the entire drive with random data or zeros, making data recovery extremely difficult. Secure erase is slower than quick erase but provides a higher level of security.
- Multi-Pass Erase: The most secure option is a multi-pass erase, where the drive is overwritten multiple times. The more passes you choose, the more secure the erase, but this also significantly increases the time required to wipe the drive. This method is recommended for drives containing highly sensitive information.
Ensuring the Drive is Properly Formatted Before Wiping
Before you wipe your drive, it's important to ensure that it is properly formatted. The format of the drive will determine how it is erased and prepared for new use. In macOS Sequoia, the recommended formats are:
- APFS (Apple File System): This is the default file system for macOS Sequoia, particularly for SSDs. It provides features like encryption, fast directory sizing, and snapshot support.
- Mac OS Extended (HFS+): This file system is used primarily for older Macs and traditional hard drives (HDDs). It's compatible with macOS but doesn't offer the advanced features of APFS.
If your drive is not already in one of these formats, you may need to reformat it before wiping. This can be done easily through Disk Utility, which we'll cover in the next section.
Methods for Wiping a Hard Drive on macOS Sequoia
macOS Sequoia provides several methods for securely wiping a hard drive. These methods range from using the built-in Disk Utility to more advanced techniques involving Terminal commands. We'll walk through each method to help you choose the one that best suits your needs.
Using Disk Utility: Step-by-Step Guide
Disk Utility is the most straightforward tool for wiping a hard drive on macOS Sequoia. It is easy to use and comes preinstalled with the operating system. Here's how to use Disk Utility to wipe your hard drive:
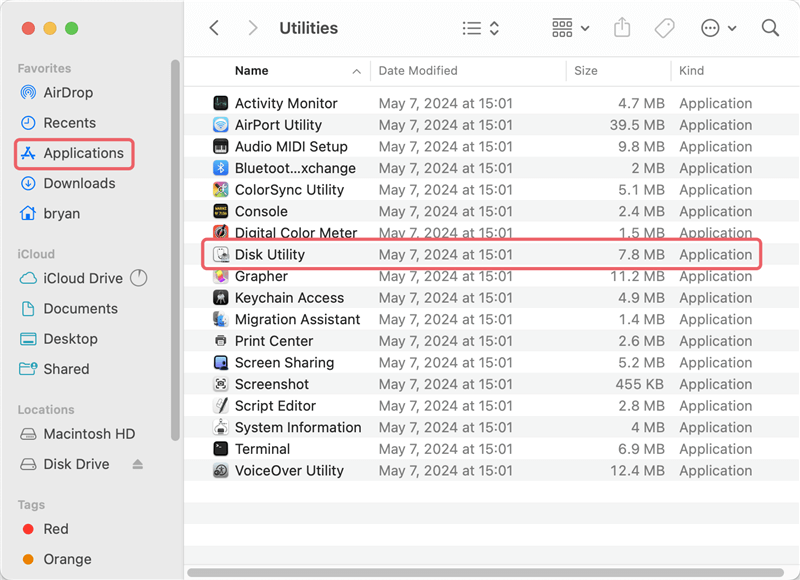
1. Accessing Disk Utility:
- Open Finder, navigate to the "Applications" folder, then to the "Utilities" folder, and launch Disk Utility.
- Alternatively, you can use Spotlight by pressing Command + Space and typing "Disk Utility."
![wipe hard drive on macOS Sequoia]()
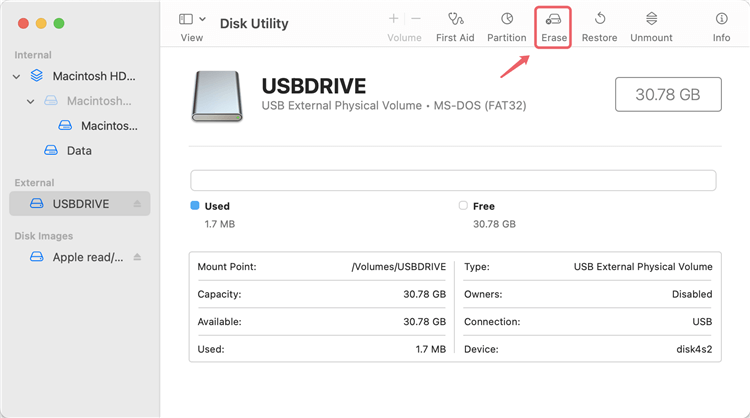
2. Selecting the Drive to Be Wiped:
- In the Disk Utility sidebar, you will see a list of available drives. Select the drive you want to wipe. Be careful to choose the correct drive, as this process will permanently erase all data on the selected drive.
3. Choosing the Erase Method:
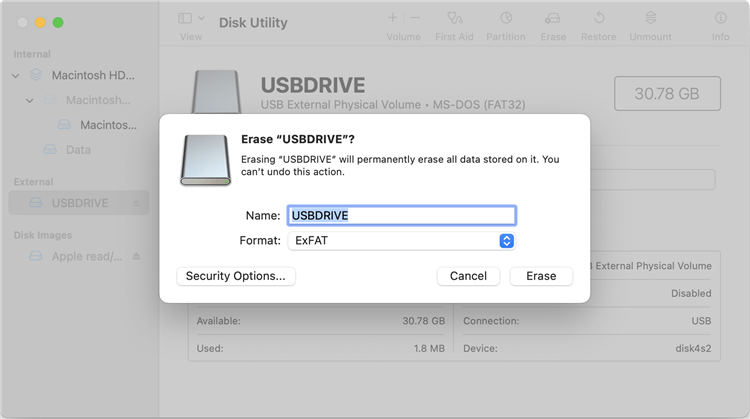
- After selecting the drive, click the "Erase" button at the top of the window.
![wipe hard drive on macOS Sequoia]()
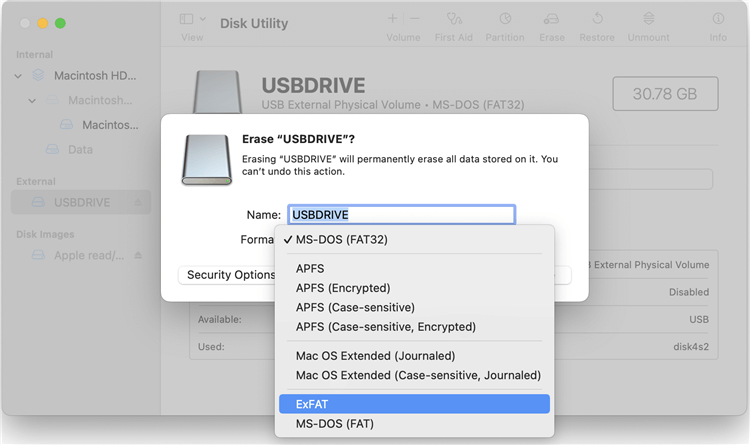
- A dialog box will appear where you can choose the drive's format and name it. Choose "APFS" or "Mac OS Extended" depending on your drive type.
![wipe hard drive on macOS Sequoia]()
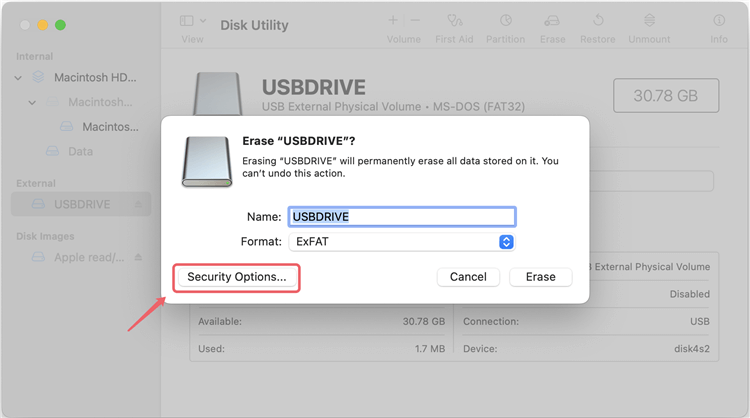
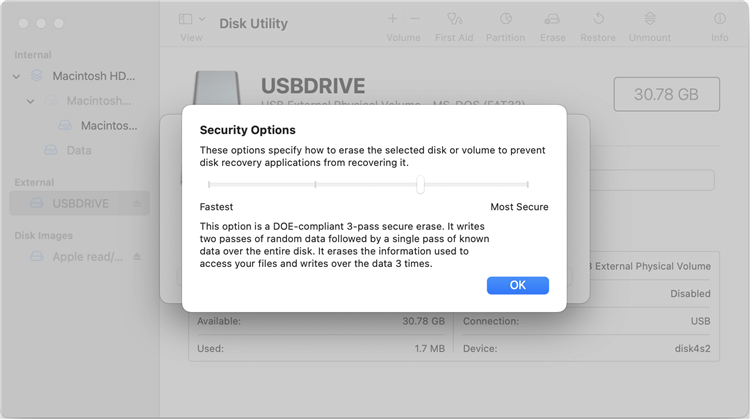
- Next, click on "Security Options" to select the erase method.
![wipe hard drive on macOS Sequoia]()
- You can choose from a quick erase, a single-pass secure erase, or a multi-pass secure erase.
![wipe hard drive on macOS Sequoia]()
- Once you've made your selections, click "Erase" to begin the process.
![wipe hard drive on macOS Sequoia]()
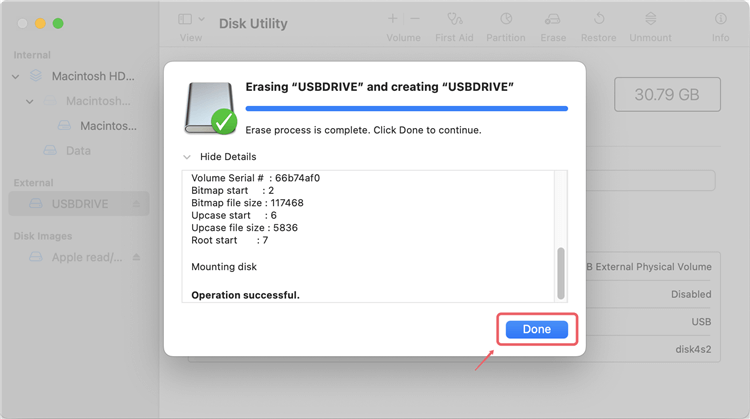
4. Executing the Wipe Process:
- Disk Utility will now erase the drive according to your selected settings. The time this takes will depend on the size of the drive and the erase method chosen.
![wipe hard drive on macOS Sequoia]()
- Once the process is complete, the drive will be empty and ready for reuse.
Using Terminal: Advanced Method for Tech-Savvy Users
For those who are comfortable with command-line interfaces, Terminal provides a powerful alternative method for wiping a hard drive. This method offers more control and is ideal for users who want to perform advanced operations.
1. Introduction to Terminal Commands for Wiping a Drive:
- Terminal in macOS Sequoia can be used to execute the diskutil command, which manages disks and volumes.
2. Step-by-Step Guide to Using the diskutil Command:
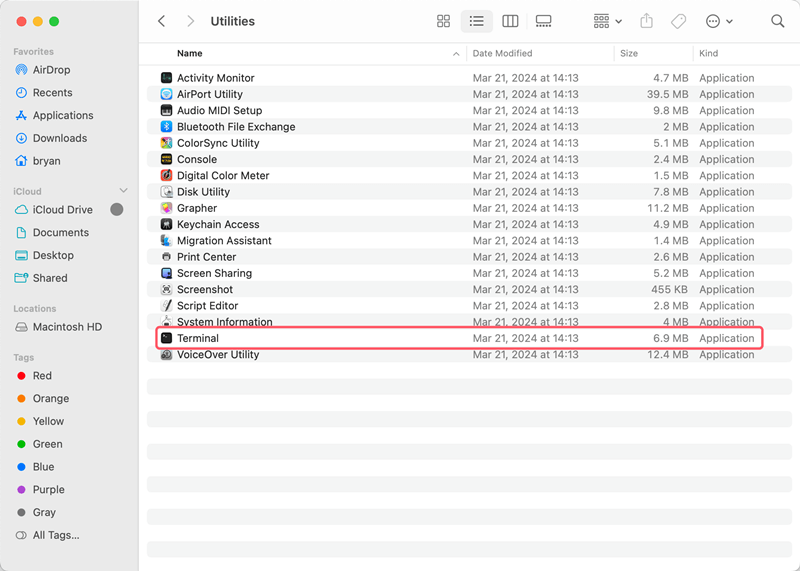
- Open Terminal (found in "Applications" > "Utilities" or via Spotlight).
![wipe hard drive on macOS Sequoia]()
- To list all available disks, type the command:
diskutil list![wipe hard drive on macOS Sequoia]()
- Identify the drive you wish to erase (it will be listed as something like /dev/disk2).
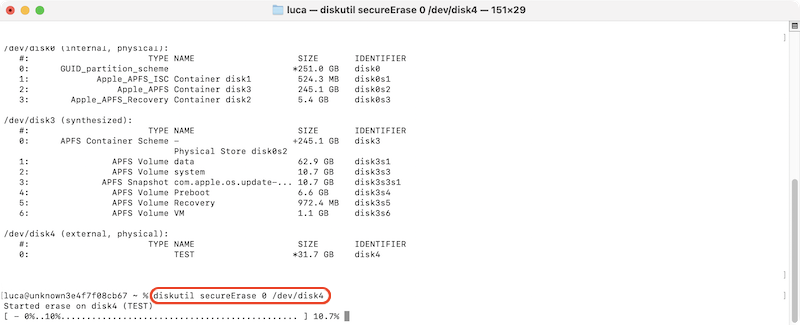
- To wipe the drive, use the following command, replacing diskX with your drive's identifier:
diskutil secureErase 0 /dev/diskX
The number 0 can be changed to specify the type of erase (0 for single-pass, 1 for 3-pass, etc.).![wipe hard drive on macOS Sequoia]()

3. Additional Options for Secure Erasure via Terminal:
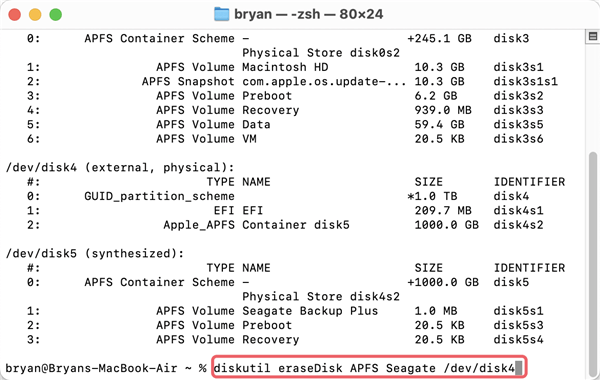
- You can also use other options such as diskutil eraseDisk to erase and format a disk in a single command:
diskutil eraseDisk APFS newname /dev/diskX
This command erases the specified disk and reformats it as APFS with a new name.![wipe hard drive on macOS Sequoia]()
Wiping a Startup Disk: Special Considerations
Wiping a startup disk requires a different approach since you cannot erase the disk while the operating system is running from it. To do this, you'll need to use macOS Recovery or create a bootable installer.
Creating a Bootable Installer or Using Recovery Mode
1.Using macOS Recovery:
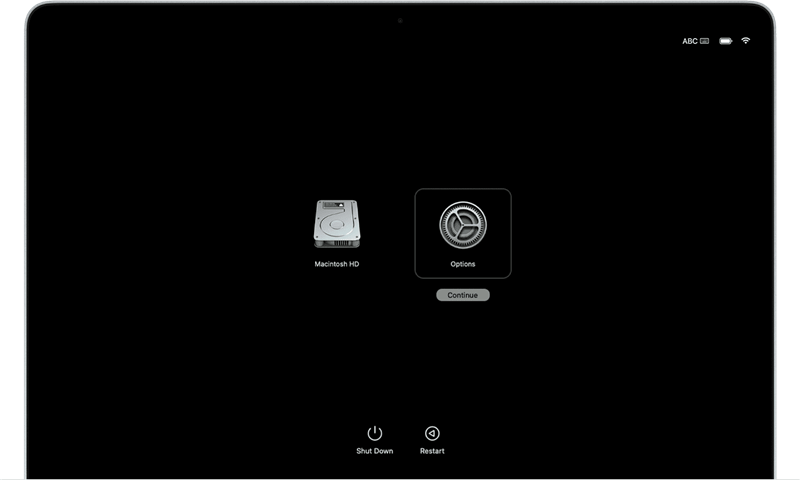
- Restart your Mac and immediately hold down Power button, then choose Options and click Continue (or using "Command + R" keys for Intel Macs) to boot into macOS Recovery.
![wipe hard drive on macOS Sequoia]()
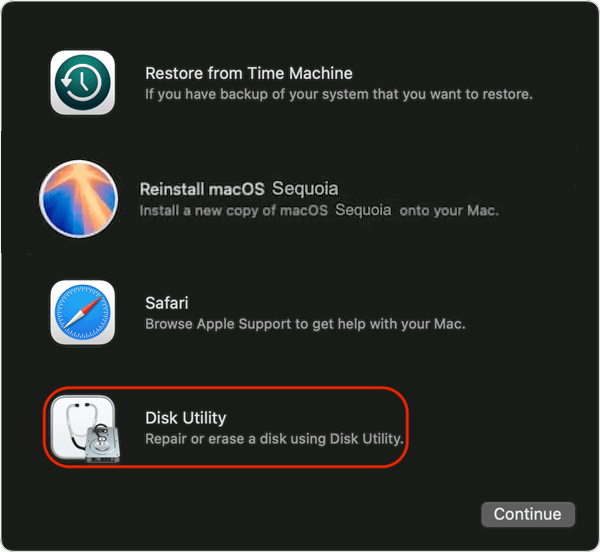
- From the Recovery menu, select Disk Utility.
![wipe hard drive on macOS Sequoia]()
- Follow the same steps as outlined in the Disk Utility section to erase the startup disk.
![wipe hard drive on macOS Sequoia]()
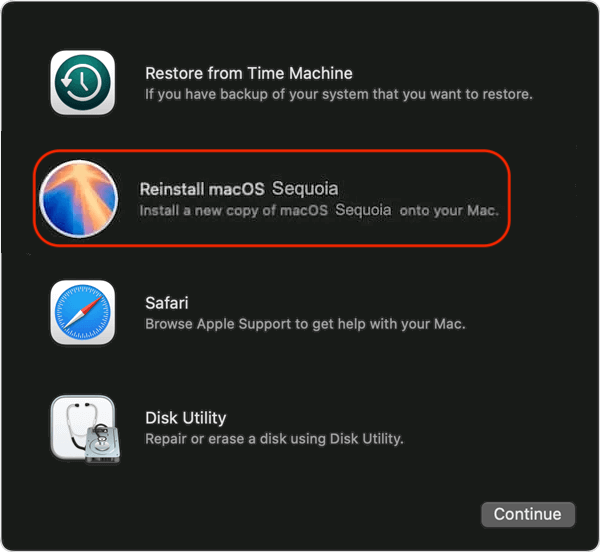
- Once erased, you can reinstall macOS using the "Reinstall macOS" option in the Recovery menu.
![wipe hard drive on macOS Sequoia]()

2.Creating a Bootable Installer:
- If you prefer, you can create a bootable installer on an external drive.
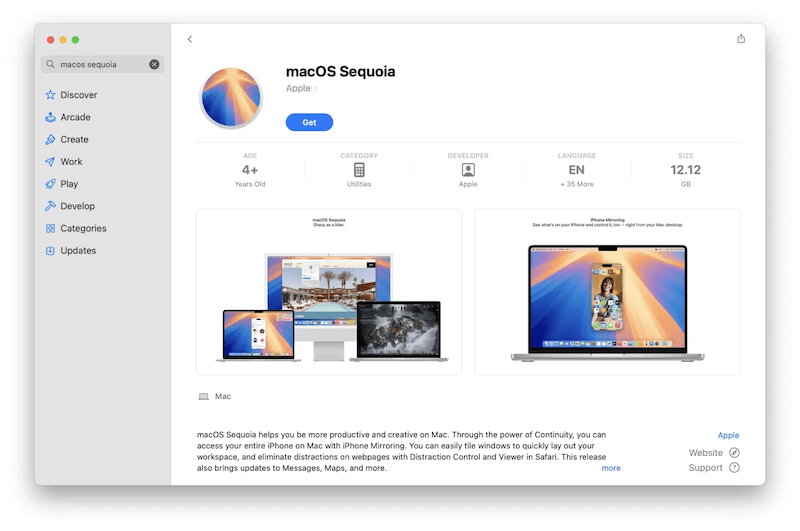
- Download the macOS Sequoia installer from the App Store.
![wipe hard drive on macOS Sequoia]()
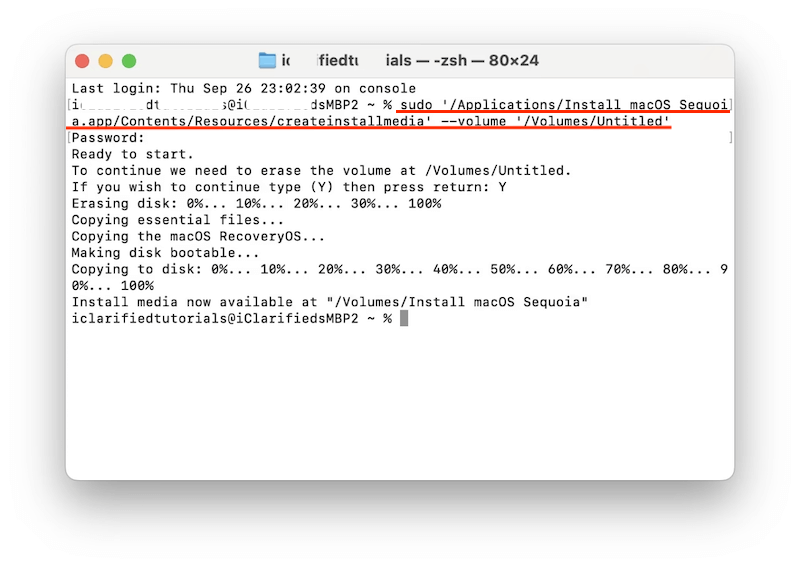
- Use Terminal to create a bootable installer on a USB drive:
sudo /Applications/Install\ macOS\ Sequoia.app/Contents/Resources/createinstallmedia --volume /Volumes/MyVolume
![wipe hard drive on macOS Sequoia]()
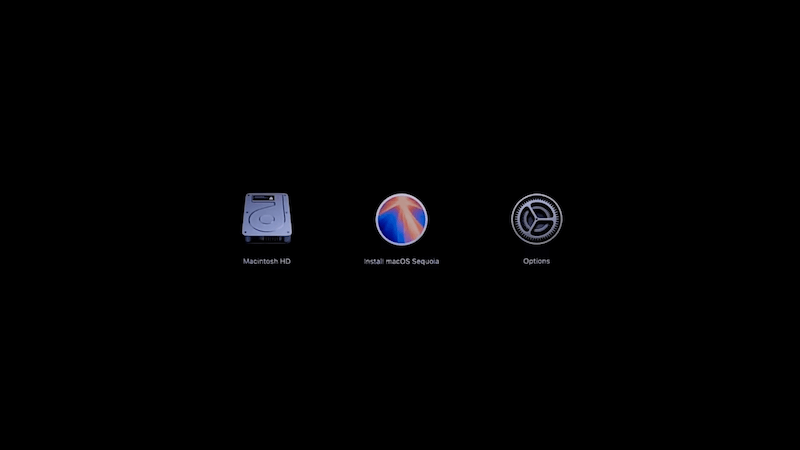
- Boot from the installer by restarting your Mac and holding the Power (or Option for old Macs) key. Select the USB drive and follow the on-screen instructions to erase and reinstall macOS.
![wipe hard drive on macOS Sequoia]()
Alternative Tool for Secure Hard Drive Wiping
While Disk Utility and Terminal are effective, some users may prefer third-party software that offers additional features and a more user-friendly interface.
Overview of Third-Party Software Option
AweEraser for Mac: AweEraser is a popular tool that includes a drive wiping feature. It allows you to securely erase the contents of an entire drive or just free space. It's ideal for those who need to ensure that no data can be recovered.
Data Eraser - AweEraser for Mac
- Securely erase hard drive data permanently.
- 3 data erasure modes for different scenarios.
- Wipe data with international data erasure standards.

Steps to Wipe Hard Drive with AweEraser for Mac:
- Connect the drive you want to erase and run the software from launchpad. Open the software and change to "Erase Hard Drive" mode. Check and select the right drive you want to wipe.
![wipe hard drive on macOS Sequoia]()
- Click "Wipe Now" button and then you will be asked to select a data erasure standard to wipe data from the selected hard drive.
![wipe hard drive on macOS Sequoia]()
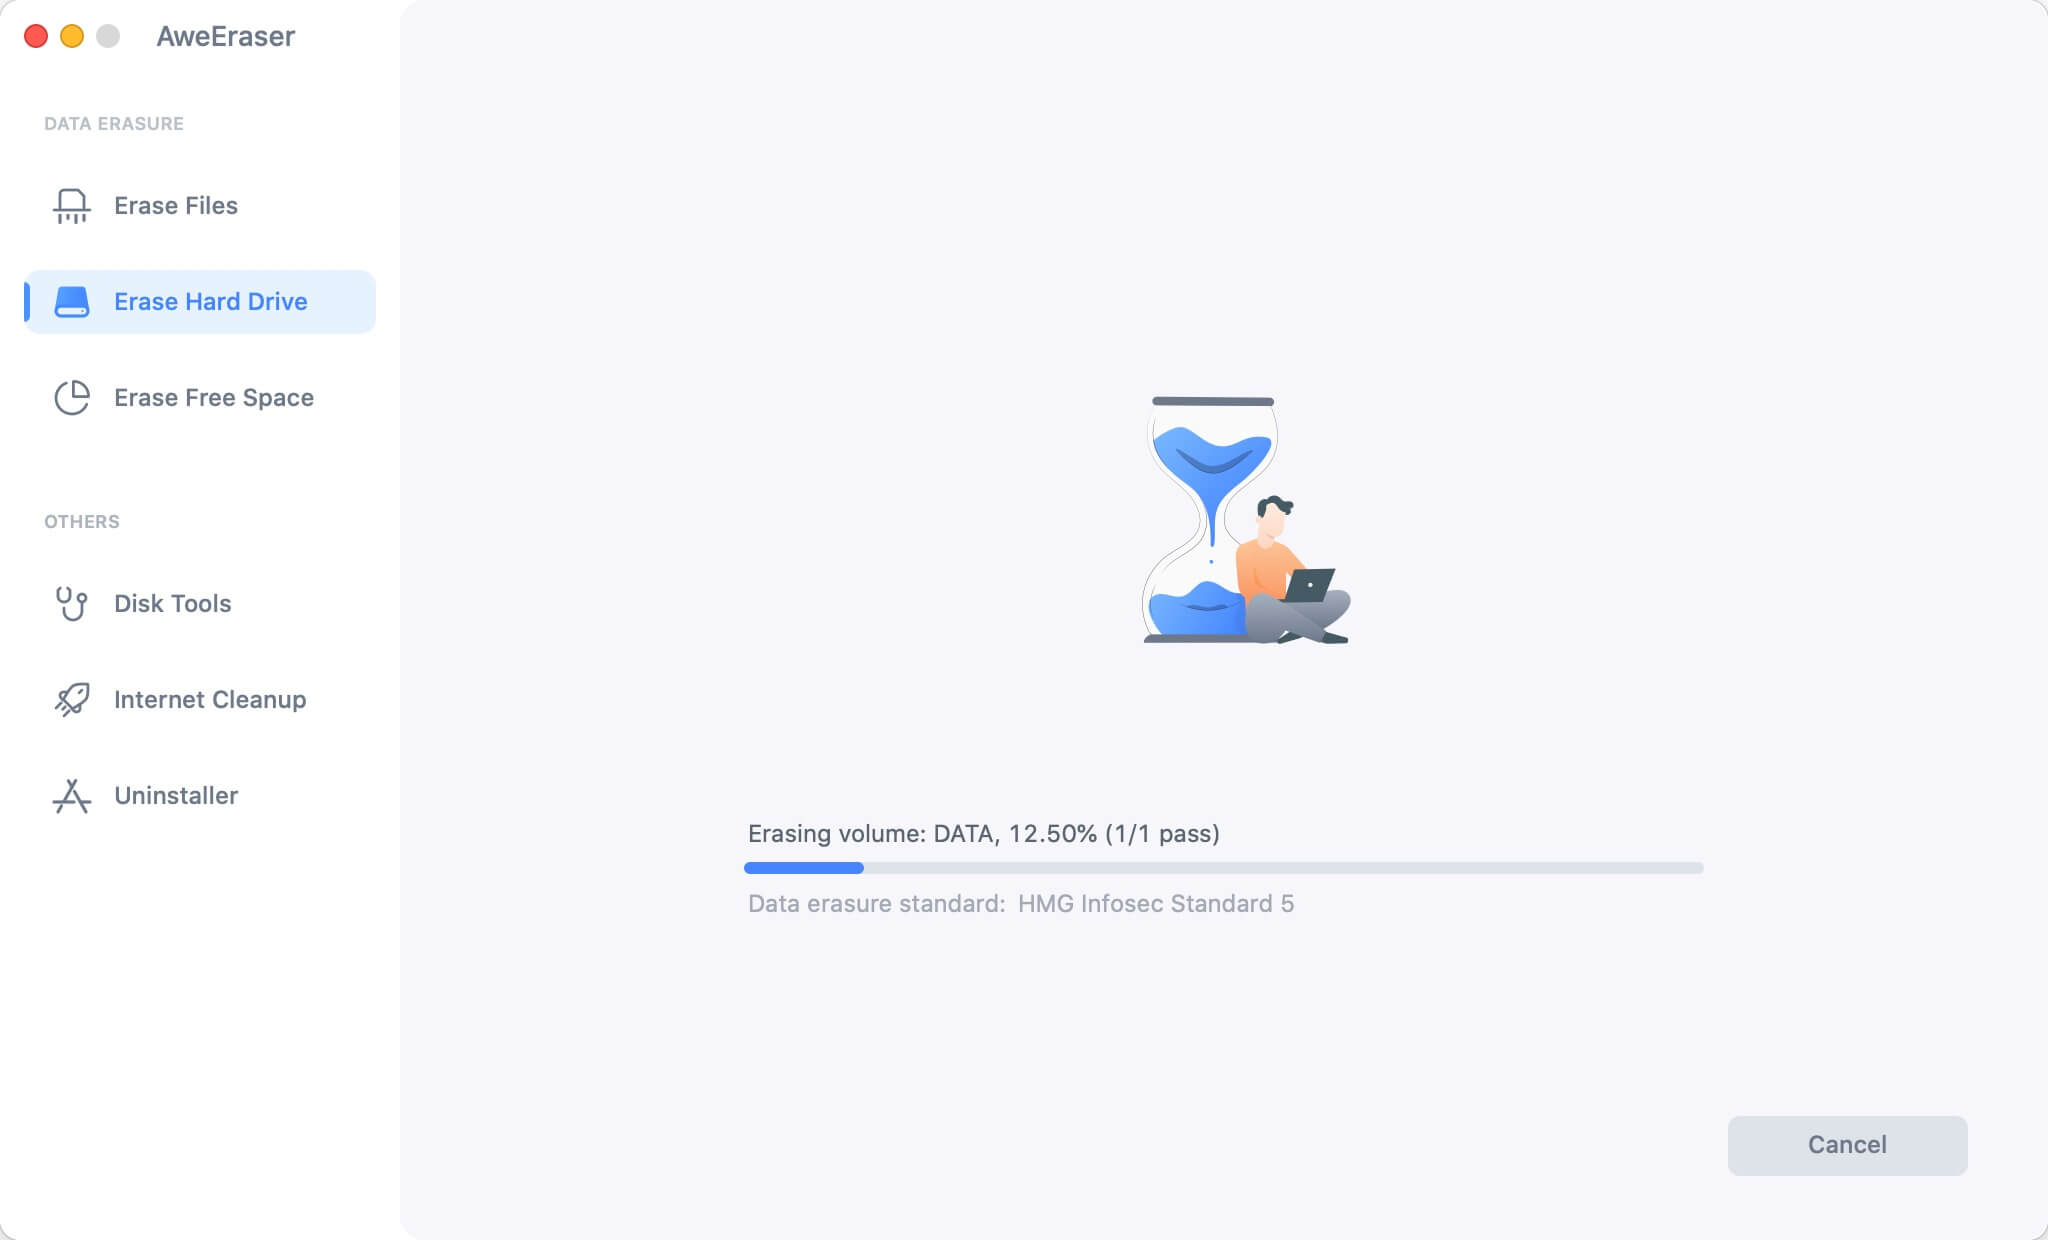
- After confirming the data erasure standard, click the "Continue" button, then the software will start to permanently wipe data from the hard drive. It will take some time depending on the size of the disk.
![wipe hard drive on macOS Sequoia]()


Comparing Features and Security Levels with macOS's Built-In Tools
Third-party tool AweEraser offers more flexibility and additional features, such as the ability to wipe specific files or folders. However, macOS's built-in tools are highly secure and integrated with the operating system, making them reliable choices for most users.
Post-Wipe Actions
After wiping your hard drive, there are a few additional steps you should take to ensure everything is in order.
Verifying the Success of the Wipe
Once the wiping process is complete, you should verify that the data has been completely erased. You can do this by attempting to recover the data using data recovery software or by checking the drive in Disk Utility to ensure it shows as empty.
Reformatting the Drive If Necessary
If the drive will be reused, you may need to reformat it after wiping. This can be done through Disk Utility by selecting the drive and choosing the desired format (APFS or Mac OS Extended, etc.).
Setting Up the Drive for New Use
If you plan to reuse the drive, such as installing a new operating system or storing new data, you can proceed with setting it up accordingly. For example, if the drive was your startup disk, you can reinstall macOS Sequoia using the steps outlined earlier.
Conclusion
Wiping a hard drive on macOS Sequoia is an essential step for anyone looking to protect their data before selling, donating, or repurposing a Mac. By following the steps outlined in this article, you can ensure that your data is completely and securely erased. Whether you use the built-in Disk Utility, Terminal, or a third-party data erasure tool, taking the time to properly wipe your hard drive will give you peace of mind, knowing that your personal information is safe and unrecoverable.