Fully Clone Hard Drive on macOS Sequoia

updated on 2025-02-08 to Mac Disk Clone
Page Content:
- Understanding Hard Drive Cloning
- Preparing to Clone a Hard Drive on macOS Sequoia
- Step-by-Step Guide to Cloning Hard Drive on macOS Sequoia
- Post-Cloning Checklist
- Conclusion

Cloning a hard drive is a vital process for many Mac users, whether you're upgrading to a new drive, migrating to a new computer, or simply ensuring you have a reliable backup of your data. With the introduction of macOS Sequoia, the process of cloning a hard drive remains a crucial task, though it requires a thorough understanding of the system's tools and capabilities. This article explores how to effectively clone a hard drive on macOS Sequoia, detailing the steps, tools, and considerations needed to ensure a smooth and successful cloning process.
Understanding Hard Drive Cloning
Hard drive cloning is the process of creating an exact, bit-for-bit copy of a hard drive onto another drive. This copy includes not just your files and folders but also the operating system, settings, and applications, making it different from a traditional backup. A cloned drive is fully bootable, meaning you can swap your original drive with the clone and continue working as if nothing has changed.
Cloning is particularly useful in several scenarios. If you're upgrading to a larger or faster drive, cloning allows you to transfer everything over without needing to reinstall macOS or any of your applications. It's also beneficial as a backup strategy, especially for those who want a full, immediately usable copy of their system in case of a drive failure.
On macOS Sequoia, the cloning process leverages the system's robust tools and modern file system architecture. The introduction of macOS Sequoia has brought enhancements to system performance and security, which can influence the cloning process, making it essential to understand how to properly prepare and execute a clone on this operating system.
Preparing to Clone a Hard Drive on macOS Sequoia
Before you begin the cloning process, it's crucial to take several preparatory steps to ensure a smooth and successful clone. Proper preparation not only prevents potential issues during the cloning process but also ensures that the cloned drive will function correctly.
Essential Steps Before Cloning
- Free Up Space: Cloning a hard drive requires sufficient space on the destination drive. The destination drive should be at least as large as the source drive to accommodate all data. Before cloning, it's advisable to free up space on the source drive by deleting unnecessary files and applications. This not only makes the cloning process faster but also reduces the amount of data that needs to be transferred.
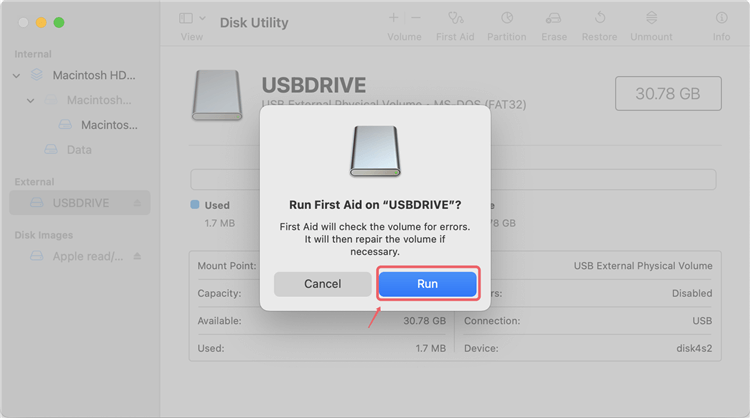
- Check for Drive Errors: Before cloning, ensure that the source drive is in good health. On macOS Sequoia, you can use the built-in Disk Utility to check for and repair any disk errors. Open Disk Utility, select your drive, and run the "First Aid" tool to scan and fix any potential issues. Addressing these errors before cloning can prevent data corruption or cloning failures.
![clone hard drive on macOS Sequoia]()
- Backup Your Data: Although cloning creates a complete copy of your drive, it's still a good idea to back up your data using Time Machine or another backup solution. This provides an additional layer of security in case something goes wrong during the cloning process.
- Ensure Compatibility: Verify that the destination drive is compatible with your Mac and macOS Sequoia. For instance, if you're cloning to an SSD, ensure that it's formatted correctly (APFS or Mac OS Extended) and that it's connected properly.
Selecting the Right Tools for Cloning
macOS Sequoia provides built-in tools that can be used for cloning, but there are also third-party solutions available that offer more features or a simplified process. The choice of tool depends on your specific needs and technical comfort level.
- Disk Utility: This built-in macOS tool is powerful and sufficient for basic cloning tasks. It's free and doesn't require any additional software installation. Disk Utility allows you to create a disk image of your drive, which can then be restored to another drive, effectively cloning it.
- Third-Party Software: Tools like AweClone for Mac and DoYourClone for Mac offer advanced features, such as incremental backups, scheduling, and more user-friendly interfaces. These tools often provide a more straightforward cloning process with additional customization options.
- AweClone for Mac: AweClone for Mac is a well-known tool for macOS users that provides comprehensive cloning and backup capabilities. The software allows users to create a bootable clone of their drive, copy specified files, or create image for drive.
- DoYourClone for Mac: DoYourClone for Mac is another popular cloning tool that offers a user-friendly interface and powerful features. Like AweClone for Mac, DoYourClone for Mac can create bootable clones and create backup images.
Step-by-Step Guide to Cloning Hard Drive on macOS Sequoia
Once you've prepared your drive and chosen your cloning tool, you're ready to proceed with the cloning process. Below is a detailed guide on how to clone a hard drive on macOS Sequoia using both Disk Utility and a popular third-party tool, AweClone for Mac.
Using macOS's Disk Utility for Cloning
Disk Utility is a versatile tool included with macOS, capable of managing disks, creating disk images, and performing the cloning process. Here's how to clone a drive using Disk Utility:
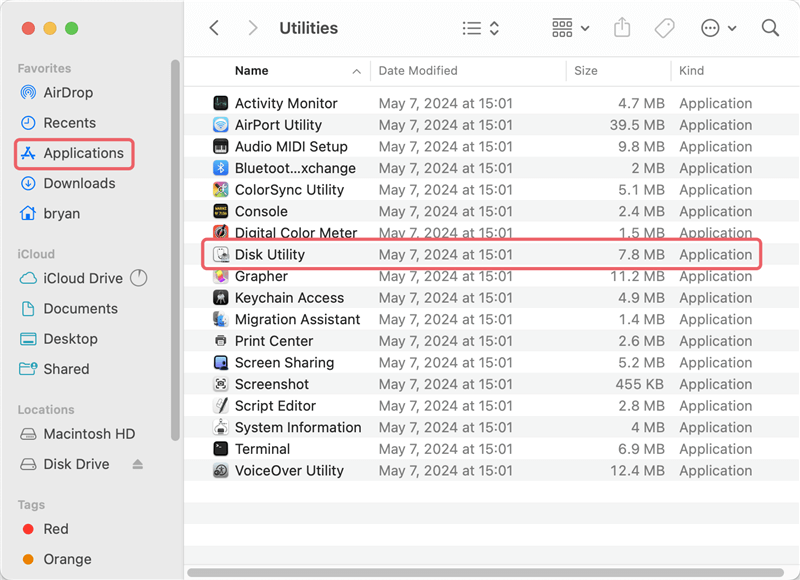
- Open Disk Utility: You can find "Disk Utility" in the "Applications" > "Utilities" folder or by searching for it using Spotlight.
![clone hard drive on macOS Sequoia]()
- Select the Destination Drive: Once the disk image is created, connect your destination drive to your Mac and select it in Disk Utility. Click the "Restore" button.
![clone hard drive on macOS Sequoia]()
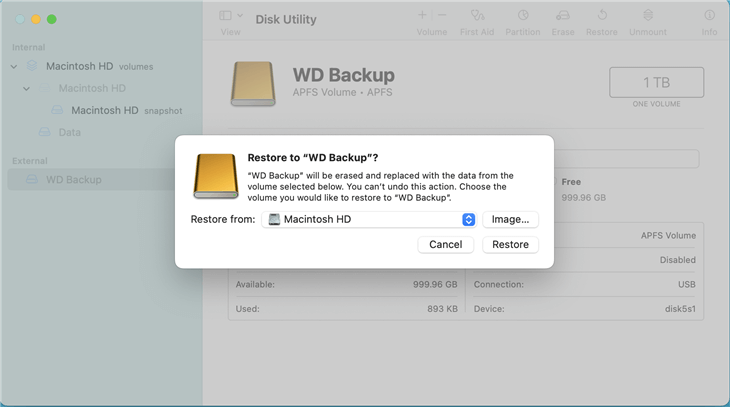
- Restore to the Destination Drive: In the popup window, choose the internal hard drive on Mac as the source. Click "Restore" to begin the cloning process.
![clone hard drive on macOS Sequoia]()
- Complete the Cloning Process: After the restoration is complete, the destination drive will be an exact copy of your original drive, including all data, settings, and macOS itself.

Use AweClone for Mac to Clone Hard Drive on macOS Sequoia
While Disk Utility is a robust tool, some users may prefer third-party software that offers additional features and a more streamlined cloning process. Two popular options are AweClone for Mac and DoYourClone for Mac, both of which are highly regarded for their ease of use and reliability.
Here we will use AweClone for Mac as an example to show you how easy it is to clone hard drive on macOS Sequoia. Here are the steps:
Step 1. Download and Install AweClone for Mac: First, download the software, and install it on your Mac. Also, connect an external drive to the Mac.
AweClone - Mac Disk Clone Software
- Most reliable disk cloning software for macOS Sequoia.
- Create bootable and full copy of Mac drive.
- Secure and easy-to-use disk copy application.

Step 2. Choose "OS Clone" Mode: Launch the application. The main interface allows you to select the a mode to copy drive, create disk image, an so on. To clone the Mac drive, you need to select "OS Clone" mode.
Step 3. Select the Destination Drives: In the next step window, the internal Mac hard drive will be selected as source by default. You can only select the external hard drive as destination for cloning.
📌 Tips: The cloning process will overwrite the destination drive, so ensure to select the right destination drive, and also back up or move the important files from the destination drive first. Or you can just use an brand new or empty external hard drive as destination.

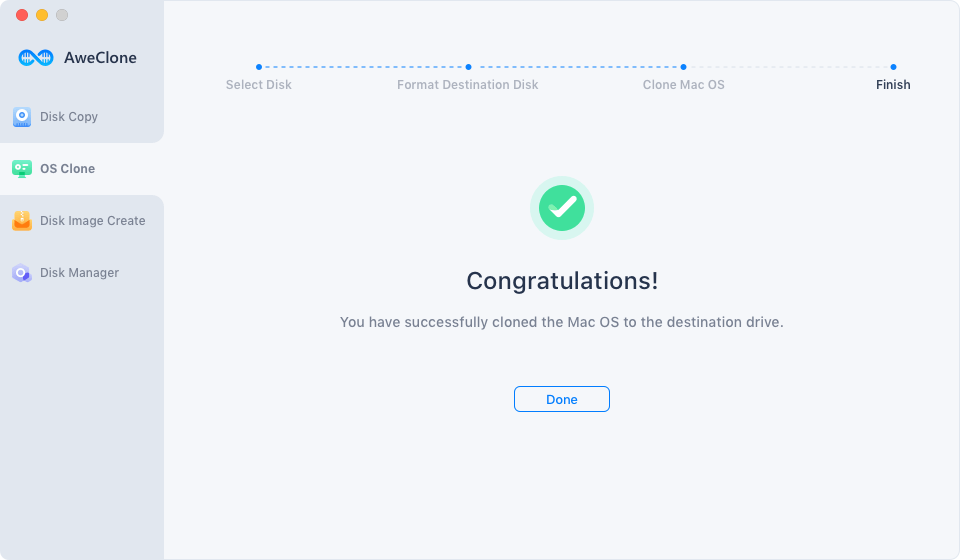
Step 4. Start the Cloning Process: Once you've configured your settings, click "Clone Now" button to start the cloning process. AweClone for Mac will copy all data from the source drive to the destination drive.

Step 5. Monitor the Process: AweClone for Mac provides real-time updates on the progress of the cloning. Once complete, you can test the cloned drive to ensure it's functioning correctly.
Post-Cloning Checklist
After completing the cloning process, it's essential to verify that the cloned drive is working as expected. Here's a checklist to ensure everything is in order:
- Verify the Success of the Cloning Process: Open Finder and check the cloned drive to ensure all files and folders have been copied over correctly. Compare the contents of the source and cloned drives to verify accuracy.
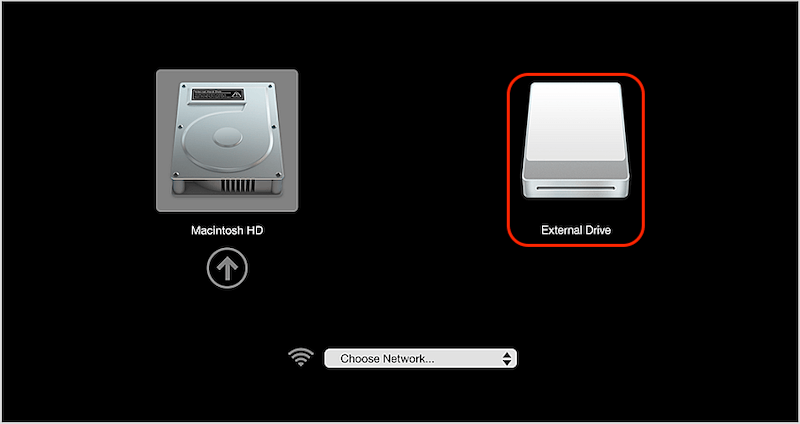
- Test the Cloned Drive: Restart your Mac and boot from the cloned drive to ensure it's fully functional. To do this, restart your Mac, hold down the Power (or Option) key during startup, and select the cloned drive from the boot menu.
![clone hard drive on macOS Sequoia]()
- Troubleshooting: If the cloned drive doesn't boot or some files are missing, revisit the cloning process and check for any errors. You may need to repeat the cloning process or try a different tool if issues persist.
- Safely Store the Drives: If the cloned drive is intended as a backup, store it in a safe place where it won't be damaged. Regularly update the cloned drive to ensure it contains the latest data.
Conclusion
Cloning a hard drive on macOS Sequoia is a valuable process, whether you're upgrading your storage, creating a backup, or simply ensuring that your data is safe. By following the steps outlined in this article, you can confidently clone your drive using both macOS's built-in tools and third-party software like AweClone for Mac. With proper preparation and careful execution, your cloned drive will serve as a reliable backup, ensuring that your data is secure and accessible whenever you need it.