If you're having trouble running macOS Big Sur or Monterey on an Apple Mac Studio computer, or if you want to start over with a fresh installation of the operating system, you'll reboot into macOS Recovery, which is done slightly differently on Apple Silicon Macs than on Intel Macs.
Continue reading to learn how to boot your Apple Silicon chip-powered system into macOS Recovery and reinstall macOS on Apple Silicon Mac, such as Mac Studio.
How to start up in macOS Recovery and reinstall macOS on Mac Studio?
Switch on your Mac Studio and keep pressing and holding the start button until the startup choices box appears.
Select the Options gear icon, then click Continue.
If you're prompted to choose a user whose credentials you remember, choose the one you want, click Next, and then enter their admin password.
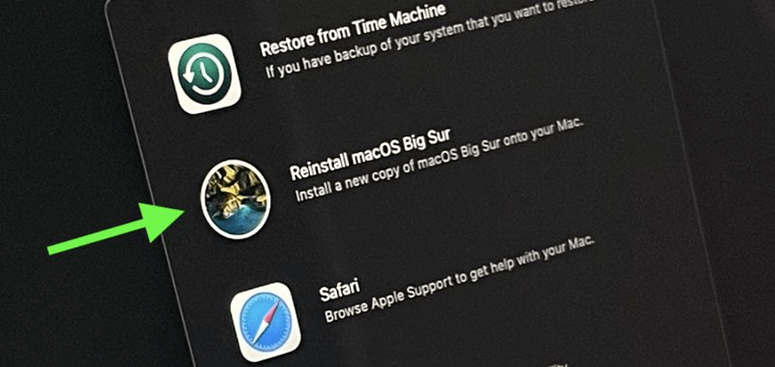
Select Reinstall macOS from the tools panel once macOS Recovery has started.
Follow the installer's directions by clicking Continue.

If you're given the option of installing on Macintosh HD or Macintosh HD Data by the installer, go with Macintosh HD.
Your Mac may restart and display a bar at the top numerous times during the macOS installation procedure, and the display may be blank for minutes at a time. These restart incidents are to be predicted and are not cause for concern. If the installer doesn't recognize your drive or claims it can't install on your Mac or volume, you might need to use Disk Utility to delete it first.
You may not be able to reinstall macOS from macOS Recovery if you wiped your Mac Studio before updating to macOS Big Sur 11.0.1. A notice may read something like this: "While preparing the update, an error occurred. The software update could not be personalized. Please try once more."
Have you tried reinstalling macOS before?
If you can boot your Apple Silicon chip Mac into macOS Recovery, you might be able to reinstall macOS without having to revive or conduct a full restoration, which both need a second Mac and Apple Configurator 2. As a consequence, your hard drive will be wiped.
While your Mac is switched off, hold down the power button until you see "Loading startup selections."
Then click Continue after selecting Options.
If required, enter your password.
Now choose Reinstall macOS from the menu and hit Continue, then follow the on-screen instructions.
What will you require to revive or repair your M1 Mac?
If you're unable to do so, or if you're convinced you to want to restore your Apple Silicon chip Mac completely, you'll need the following items:
A second Mac running Apple Configurator 2 (latest version) (and internet access) According to Apple, "you may need to modify your web proxy or firewall ports to allow all network traffic from Apple devices to Apple's network 17.0.0.0/8." More information is available on Apple's official website.
You'll need a USB-C to USB-C cable (or USB-A to C cable) Apple says that it must manage both power and data, and thus Thunderbolt 3 connections will not work.
How to resurrect or restorative practices?
If your Mac Studio starts to slow down, you may try a resuscitate, which won't destroy your data. You can restore your Mac Studio if it doesn't function or if you realize you want to erase it. The key steps are as follows: On a second Mac, launch Apple Configurator 2 and connect it to the affected Mac.
Follow a specific technique to restart your Apple Silicon Mac that isn't responding.
Use Apple Configurator 2 to resurrect or restore the secondary Mac.
Restoring a (working) Mac from a backup
In Apple Configurator 2, choose the M1 Mac that has to be repaired.
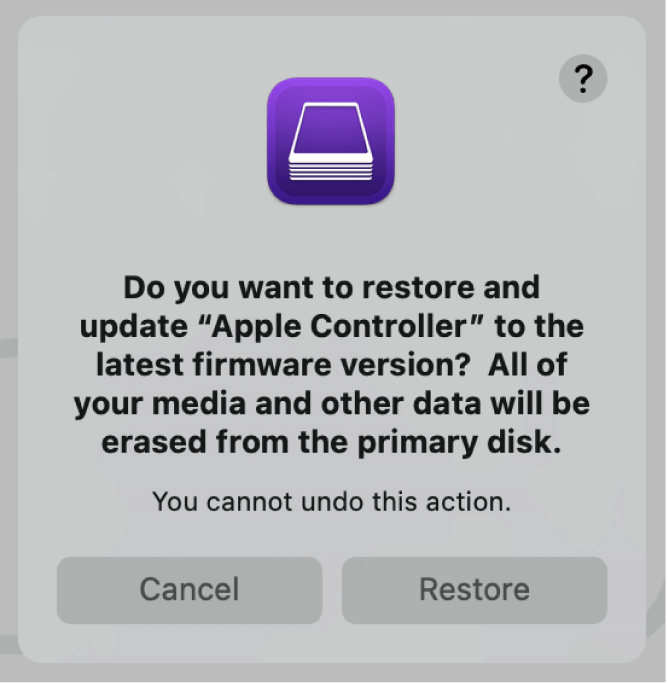
Control-click M1 Mac > Restore from the menu bar at the top, or select Actions > Restore from the menu bar at the top.
Select Restore from the dialogue box to finalize the process.
The operation may take some time, and during that time, the Apple logo will show and vanish.
Your Mac will restart after the process is completed.
"You must ensure that the process has finished while restoring the Mac since Apple Configurator 2 may not alert you," as with revive.
The macOS Setup Assistant will appear if a restore for an M1 Mac is successful, according to Apple.
You may now close Apple Configurator 2 and unplug your secondary Mac's USB cable.

During the macOS setup process, your Mac may reboot and show a progress bar numerous times, and the screen may be empty for several minutes at a time. These restarts are normal and should not be taken as cause for concern. Remove the CD first using Disk Utility if the installer doesn't identify it or says it can't install on your Mac or volume.
You may not be able to reinstall macOS using macOS Recovery if you wiped your M1 Mac before updating to macOS Big Sur 11.0.1. A notice may read something like this: "While preparing the update, an error occurred. It was not feasible to personalize the software upgrade. Please give it a second chance."
Create a bootable clone backup for Mac Studio
Mac disk cloning software is able to securely and easily clone disk drive on Mac. If you want to make a backup of Mac Studio, you can try Mac disk cloning software - such as AweClone for Mac.
AweClone for Mac
- Clone any type of hard drive including Mac Studio’s startup disk on Mac.
- Create a bootable clone backup for Mac.
- Create disk image on Mac.
Now, follow the steps below to create a bootable clone backup for Mac Studio. Once your system gets crashed, you can use the clone backup to restore the OS on your Mac Studio.
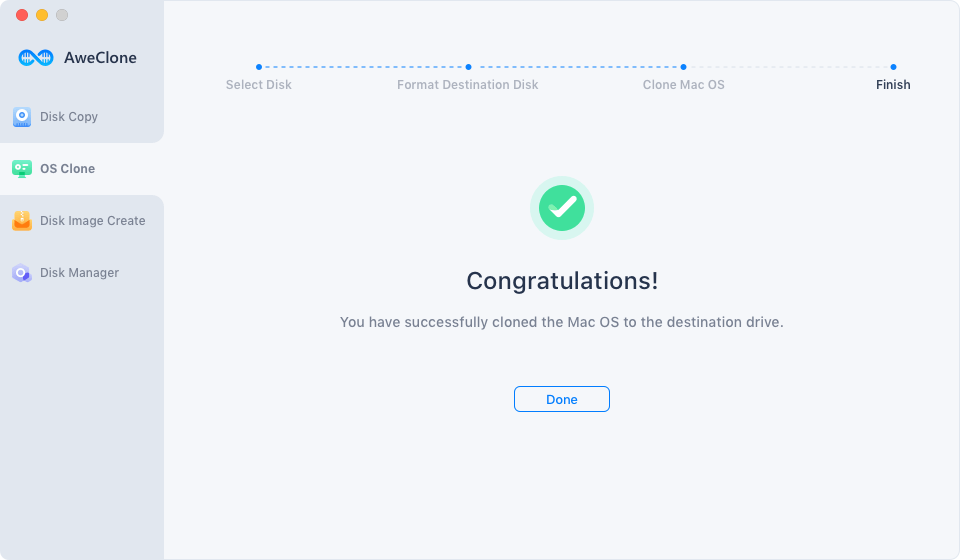
Step 1. Connect an external hard drive to your Mac Studio. Then run AweClone for Mac, choose disk cloning mode - OS Clone.

Step 2. Select the external hard drive as the destination drive. Click on Clone Now button to securely clone Mac Studio’s startup disk to the external hard drive.

Then clone backup can be used as a bootable disk or can be used as a source drive to restore macOS on your Mac Studio.


