How to Recover Lost Data After Upgrading to macOS Sequoia?

updated on August 18, 2024 to Mac Data Recovery Solutions
Quick Navigation:
- Have You Upgraded to macOS Sequoia?
- Data Loss After Upgrading to macOS Sequoia
- Three Methods to Recover Lost Files after Upgrading to macOS Sequoia
- Advanced Tips for Data Recovery on macOS Sequoia
- Conclusion
- FAQs About Recovering Lost Files after Upgrading to macOS Sequoia
macOS Sequoia, Apple's latest operating system update, brings a host of new features and improvements designed to enhance user experience and productivity. However, like any major software upgrade, transitioning to macOS Sequoia can sometimes result in unexpected challenges, such as data loss. Whether due to software conflicts, failed installations, or unforeseen errors, losing important files during or after an upgrade can be distressing. This guide will walk you through the steps to recover lost data effectively, ensuring you can mitigate the impact and restore your files with confidence.
Have You Upgraded to macOS Sequoia?
macOS Sequoia represents Apple's commitment to innovation and security, offering users a refined experience with enhanced performance and new features. Despite rigorous testing, upgrading to a new macOS version can occasionally lead to data loss. This can happen due to various reasons, including incomplete installations, software conflicts, or unforeseen errors that affect your system's stability.
When facing data loss after upgrading to macOS Sequoia, it's crucial to act swiftly and methodically to recover your files. This guide provides comprehensive steps, from initial checks to using built-in tools and third-party software, ensuring you have the best chance to retrieve your lost data.
Data Loss After Upgrading to macOS Sequoia
Before learning macOS Sequoia data recovery methods, it's essential to understand why data loss can occur during macOS upgrades:
- Delete + Empty Trash Bin: Delete files by mistake and have emptied the trash bin.
- Erase Hard Drive: Format or erase hard drive without backup.
- Software Conflicts: Incompatibilities between existing software and the new macOS version can lead to files becoming inaccessible or corrupted during the upgrade process.
- Failed Installations: If the macOS installation process fails midway, it can leave your system in an inconsistent state, potentially causing data loss or rendering files unreadable.
- System Errors and Storage Corruption: Errors during the upgrade process or existing issues with your Mac's storage, such as disk errors or corrupted sectors, can result in data loss.
Immediate Steps to Take After Noticing Data Loss:
Upon discovering data loss after upgrading to macOS Sequoia, take the following immediate steps to maximize the chances of successful recovery:
- Stop Using Your Mac: Immediately stop using your Mac to prevent overwriting the lost data. Continued use of the system can inadvertently overwrite deleted files, making recovery more challenging.
- Perform Basic Checks: Restart your Mac and check if the missing files appear. Sometimes, a simple restart can resolve minor issues that lead to data disappearance.
- Use Time Machine Backups: If you have set up Time Machine, Apple’s built-in backup solution, you can restore lost files using it. Here's how to do it:
- Connect Your Backup Drive: Attach the Time Machine backup drive to your Mac.
- Access the Desired Location: Open Finder and go to the folder or directory where the lost files were originally stored.
- Enter Time Machine: Click on the Time Machine icon in the menu bar and select "Enter Time Machine."
- Browse and Restore: Navigate through the available snapshots to find and restore the specific files or entire folders you need.
Three Methods to Recover Lost Files after Upgrading to macOS Sequoia
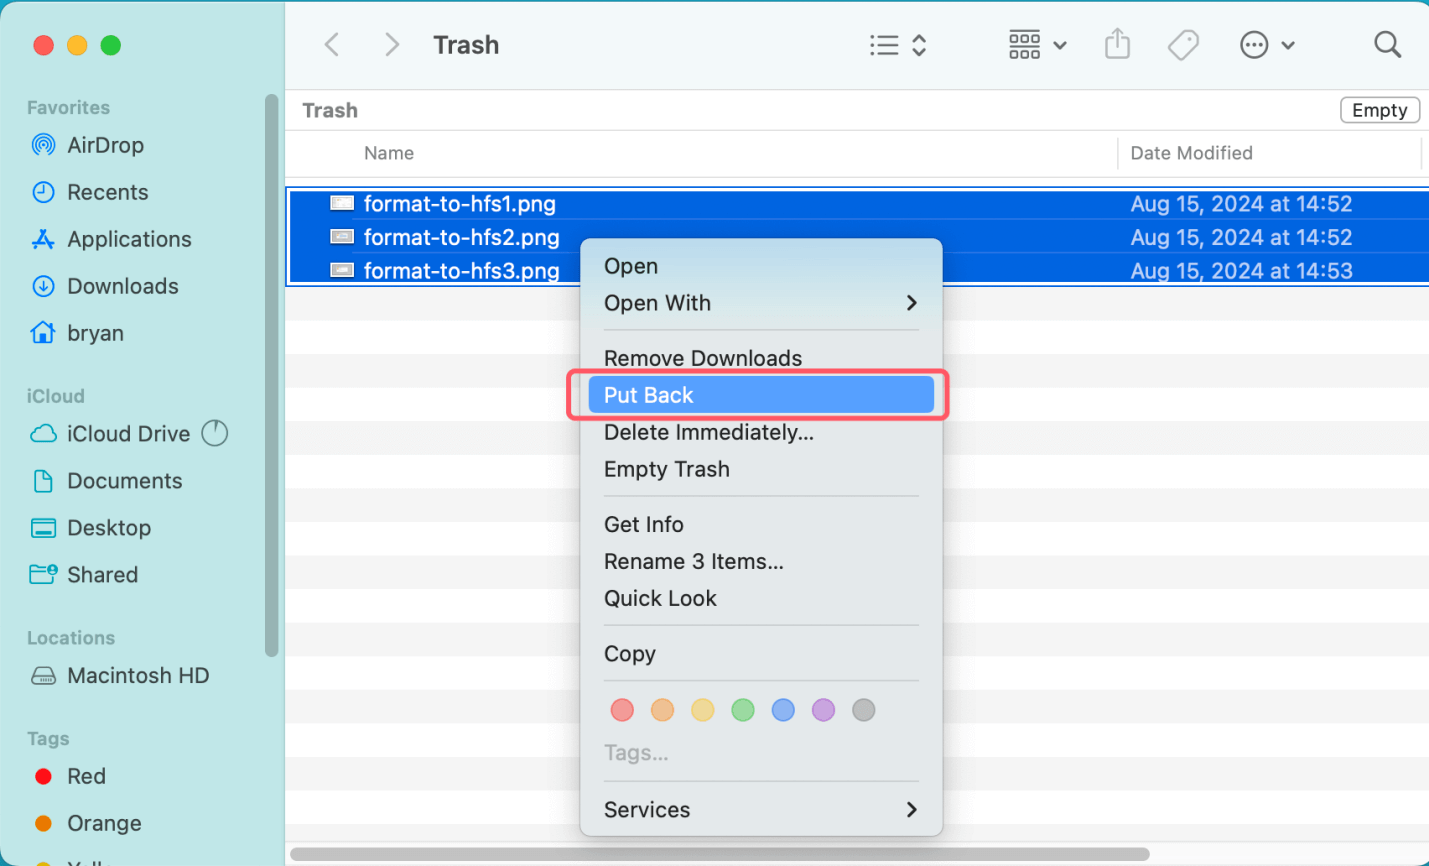
Method 1: Check Trash Bin
First of all, check if you can put back the deleted files from the trash bin.
- Open Trash from Dock.
- View the deleted items in Trash, if you can find the files you want to restore, select them and right-click.
- Choose Put Back to restore them.
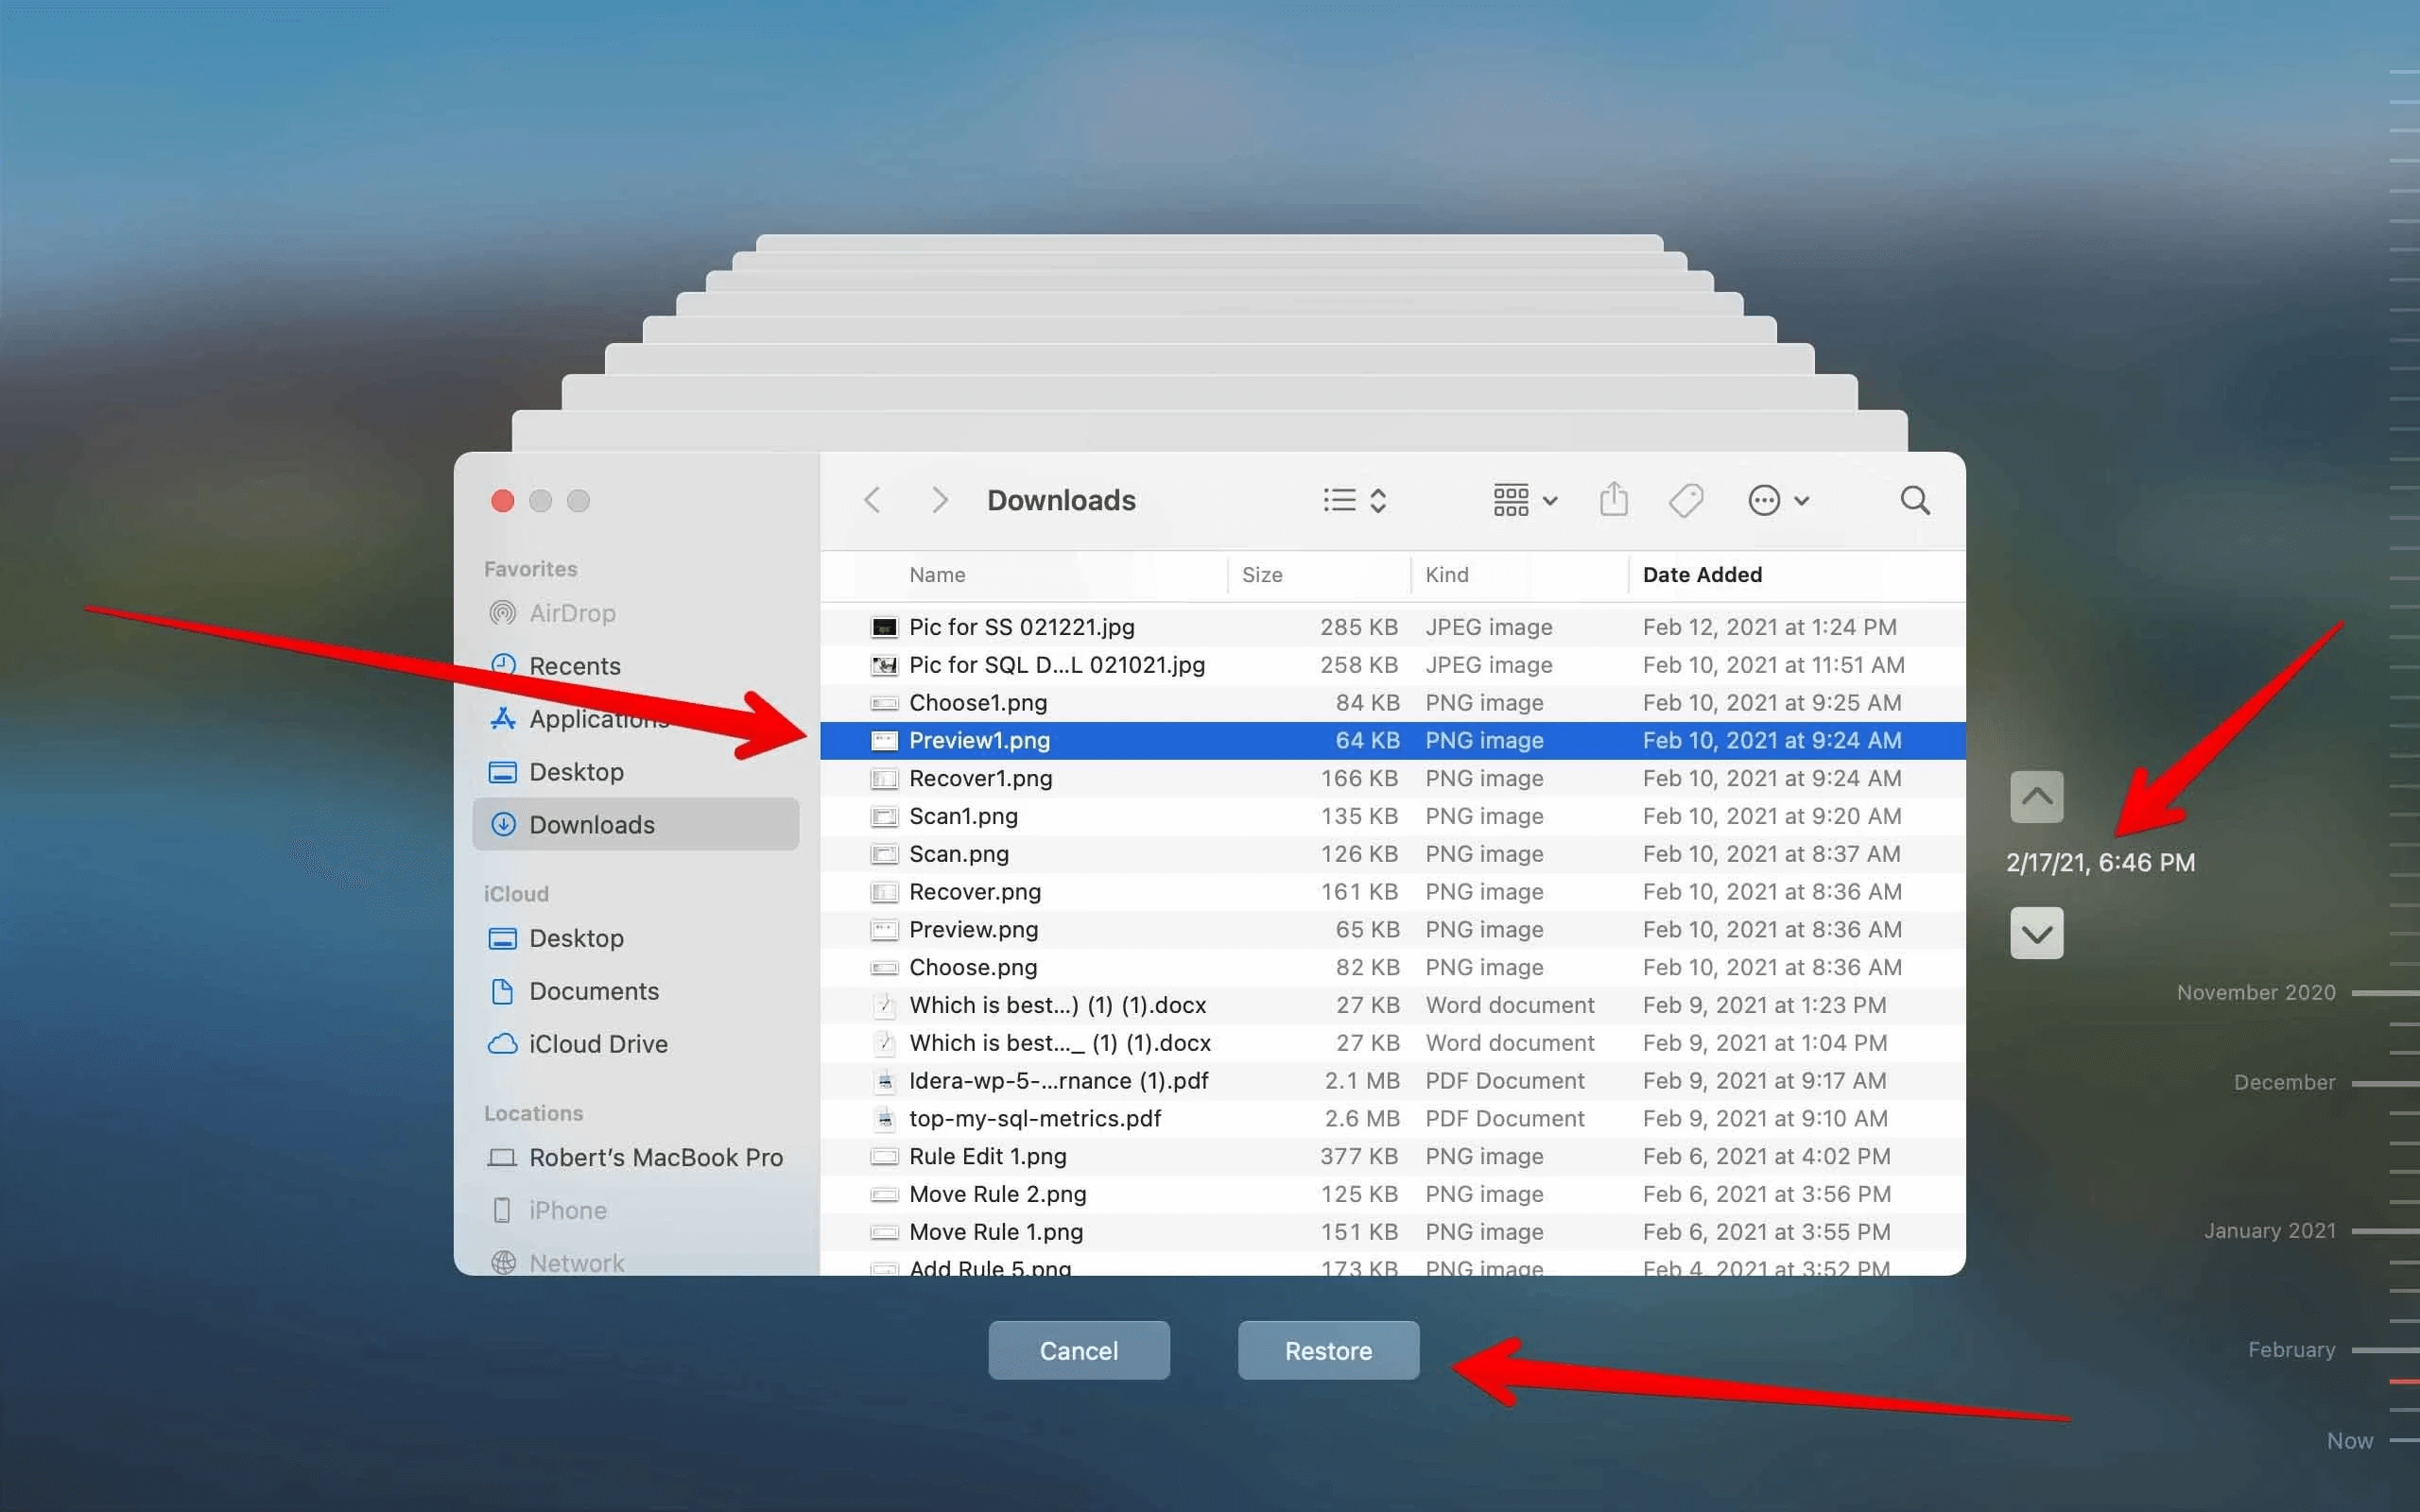
Method 2: Restore Lost Files from Time Machine Backup
As mentioned earlier, Time Machine allows you to restore files from backups created before the upgrade. Follow the steps outlined above to access and restore your lost data.
- Open the location where you delete or lose the files. If you lose files on desktop, you don't need to open a location.
- Go to System Settings > General > Time Machine, open Time Machine, then find the deleted items you want to restore.
- Select the wanted file, click on Restore button.
Method 3: Use Data Recovery Software
If built-in tools like Time Machine and Trash Bin do not recover your lost data, consider using third-party data recovery software. These specialized tools can scan your Mac's storage for deleted or lost files, often retrieving data that built-in tools cannot. Here’s how to proceed:
1. Select a Reliable Data Recovery Tool: Research and choose reputable data recovery software compatible with macOS Sequoia. Popular options include Magoshare Data Recovery for Mac, Disk Drill, EaseUS Data Recovery Wizard, and Stellar Data Recovery.
Magoshare Data Recovery for Mac is a powerful Mac data recovery program. It can help you securely and completely recover all lost files after upgrading to macOS Sequoia.
2. Download and Install the Software: Download the selected data recovery software from its official website or the App Store. Follow the installation instructions provided to install the application on your Mac.
Magoshare Data Recovery for Mac
- Recover permanently deleted files on macOS Sequoia.
- Recover erased or formatted data on macOS Sequoia.
- Recover inaccessible or corrupted data on macOS Sequoia.


After downloading Magoshare Data Recovery for Mac, click the .dmg file and install it on your Mac. Then open it, select the drive where you delete or lose your files to start data recovery.

3. Scan Your Mac's Storage: Launch the software and use it to perform a thorough scan of your Mac's storage device where the lost files were located. This scanning process may take some time, depending on the size of the storage and the extent of the data loss.

4. Preview and Retrieve Lost Files: Once the scan is finished, the software will show a list of files that can be recovered. Preview these files to confirm their integrity, then choose the ones you wish to recover. Save the recovered files to a secure location to prevent overwriting any existing data on your Mac.

Advanced Tips for Data Recovery on macOS Sequoia
In addition to the basic steps and tools already discussed, there are advanced strategies and techniques that can further improve your chances of recovering lost data after upgrading to macOS Sequoia.
1. Use of Recovery Mode
- Accessing macOS Recovery Mode: If you encounter significant issues during the upgrade that prevent your Mac from booting normally, macOS Recovery Mode can be a lifesaver. To access it, restart your Mac and immediately press and hold Power button until you see the macOS Recovery mode screen. From here, you can use tools like Disk Utility to attempt repairs or restore from a Time Machine backup.
- Reinstall macOS Without Data Loss: Sometimes, the upgrade might cause system instability, leading to data inaccessibility. In such cases, reinstalling macOS without erasing your disk can help restore system functionality while preserving your data. To do this, select "Reinstall macOS" in Recovery Mode and follow the on-screen instructions.
2. Target Disk Mode for Data Recovery
- What is Target Disk Mode? Target Disk Mode is a feature that allows one Mac to act as an external hard drive for another Mac. This can be particularly useful if your Mac is unbootable or experiencing severe issues after the upgrade.
- How to Use Target Disk Mode: Connect two Macs with a Thunderbolt, USB-C, or FireWire cable. Restart the faulty Mac while holding the T key to enter Target Disk Mode. The faulty Mac’s disk should appear as an external drive on the second Mac, allowing you to access and recover your files.
3. Cloning Your Drive Before Recovery Attempts
- Why Cloning is Important: Before attempting any data recovery on a problematic drive, consider cloning it to another storage device. This ensures that you have a complete copy of the drive's current state, which can be invaluable if further attempts at data recovery are needed or if the original drive deteriorates further.
- How to Clone a Drive: Tools like AweClone for Mac, Carbon Copy Cloner or SuperDuper! allow you to create a bootable clone of your Mac's drive. This cloned drive can then be used for recovery operations, safeguarding the original data from potential overwriting.
Contacting Professional Data Recovery Services
If you cannot recover your lost data with built-in tools or third-party software, you might need to turn to professional data recovery services. These experts specialize in recovering data from severely damaged or otherwise inaccessible storage devices. Here’s what to keep in mind:
- When to Seek Professional Help: If your attempts with DIY methods have been unsuccessful or if your data loss is critical (e.g., due to hardware failure), professional data recovery services may be necessary.
- Choosing a Data Recovery Service: Research reputable data recovery companies with expertise in macOS data recovery. Look for reviews and testimonials to gauge their reliability and success rates.
- Evaluating Costs and Services: Contact the data recovery service to discuss your case. They will provide an evaluation of your data recovery chances and a quote for their services. Evaluate the cost versus the value of your lost data before proceeding.
Preventing Future Data Loss During Upgrades
While recovering lost data is essential, preventing future data loss is equally crucial. Follow these best practices to safeguard your data during macOS upgrades:
- Regular Backups: Maintain regular backups using Time Machine or cloud-based backup solutions. This ensures you have a recent copy of your data in case of unexpected data loss.
- Prepare Your Mac Before Upgrades: Before upgrading to a new macOS version, ensure your Mac meets the system requirements and is free from software conflicts. Consider backing up your data again before proceeding with the upgrade.
- Stay Informed About Updates: Keep your Mac and applications up to date with the latest software updates and security patches. This reduces the risk of encountering known issues that could lead to data loss.
Conclusion
Experiencing data loss after upgrading to macOS Sequoia can be distressing, but with the right approach, you can often recover your lost files successfully. Start with immediate steps like stopping use of your Mac and utilizing Time Machine backups. If needed, explore built-in macOS tools like Trash and consider using third-party data recovery software. For more challenging cases, professional data recovery services may provide the expertise needed to retrieve critical data.
By understanding the causes of data loss during upgrades and implementing preventive measures, you can minimize the risk of future data loss incidents. Remember to maintain regular backups and stay informed about software updates to ensure a secure and reliable computing experience with macOS Sequoia.
FAQs About Recovering Lost Files after Upgrading to macOS Sequoia
1. How to recover lost files after upgrading to macOS Sequoia?
Mac data recovery software can easily and completely recover lost files in macOS Sequoia:
- Download and install Magoshare Data Recovery for Mac.
- Open Magoshare Data Recovery for Mac, select the drive where you lose your files.
- Click on Scan button.
- Preview and recover lost files after upgrading.
2. How to recover lost files from external drive, USB drive or SD card on macOS Sequoia?
Connect the external hard drive, USB drive or SD card to your Mac, then run the Magoshare Data Recovery for Mac to deeply scan the device and then recover all deleted/formatted or lost files.
3. What is the best data recovery software for macOS Sequoia?
Here is the list of top 5 macOS Sequoia data recovery software:
- Magoshare Data Recovery for Mac
- Do Your Data Recovery for Mac
- Stellar Data Recovery for Mac
- Disk Drill
- Donemax Data Recovery for Mac